Cache Enabler is a simple and lightweight caching plugin for WordPress that can significantly improve your website's performance, particularly websites built using slow themes on shared hosts. This guide will help walk you through what our recommended settings are for most WordPress websites using this plugin.
Understanding Cache Enabler
Cache Enabler, in simplistic terms, improves the website's load time by saving a static HTML copy of your website's pages. By doing so, the server saves resources because it doesn't need to query the database or spin up PHP workers to build your pages on the fly. This then dramatically improves your website's performance metrics, including Time to First Byte (TTFB) and overall page load times.
Recommended Configuration Settings
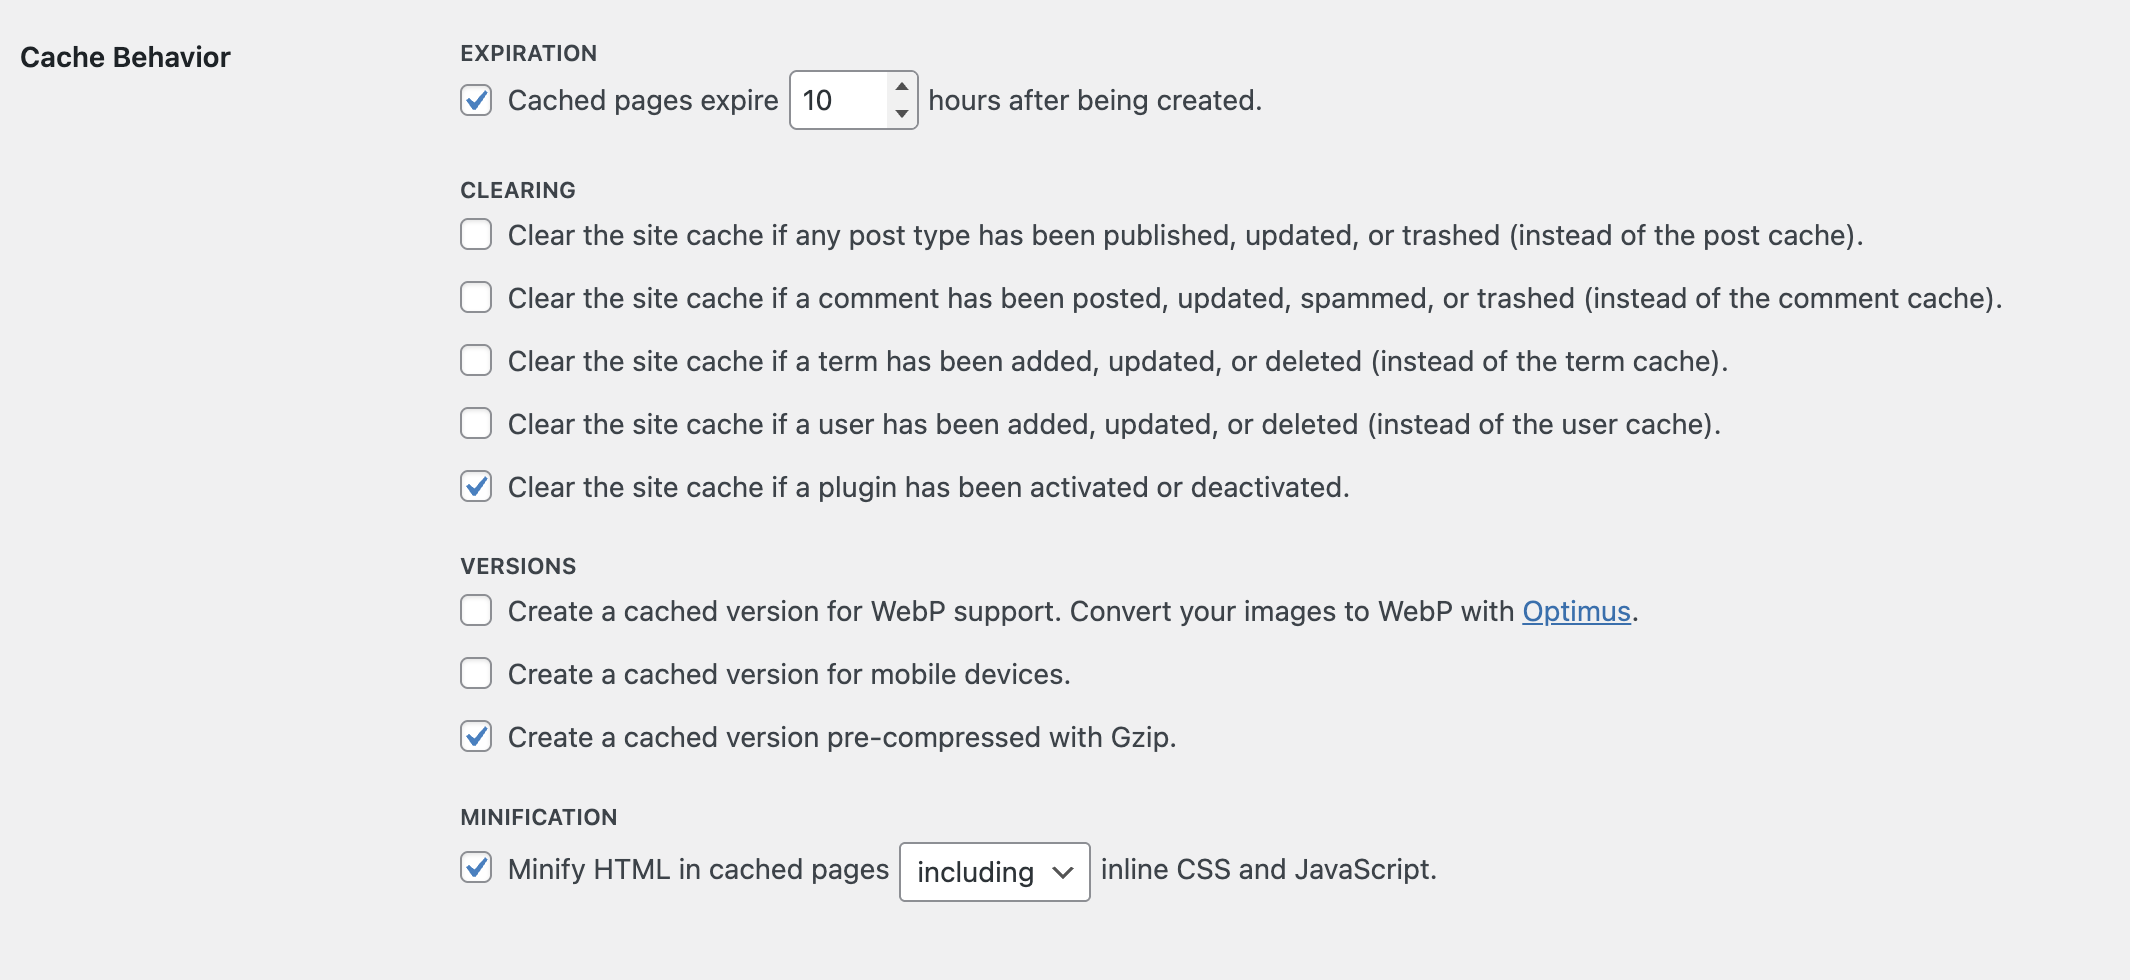
Expiration Settings
- Enable cached pages to expire: Yes
- Expiration time: 10 hours
We recommend setting the expiration to 10 hours because the default nonce lifetime in WordPress is 12 hours, so this avoids issues with features like Ajax forms, which often add nonces for handling submissions.
Cache Clearing Triggers
For optimal performance with minimal cache management overhead:
- ✓ Clear site cache when a plugin is activated or deactivated
Clearing the entire site cache in every other circumstance isn't necessary, so we only recommend, for compatibility reasons, clearing the site cache if a plugin is deactivated or activated.
Version Creation
- ✓ Create a pre-compressed version with Gzip
Pre-compressing pages with Gzip reduces the load on the server by not needing to compress pages on the fly. It's a very slight improvement, but it is an improvement nonetheless. You should only enable a separate version for WebP if you have a WebP plugin enabled.
Minification
- ✓ Minify HTML in cached pages, including inline CSS and JavaScript
Enabling HTML minification with inline CSS and JavaScript reduces file sizes further, improving load times it also removes code comments from production.
Implementation Guide
- Install Cache Enabler: Navigate to Plugins > Add New in your WordPress dashboard, search for "Cache Enabler," install and activate it.
- Configure Settings: Go to Settings > Cache Enabler and apply the configuration outlined above.
- Test Your Configuration: After saving settings, visit your website in an incognito browser window to ensure everything loads correctly.
Conclusion
These recommended settings for Cache Enabler strike a balance between high performance, easy maintenance, and great compatibility. This will ensure your WordPress website loads quickly for all visitors and will lead to an improvement in your website's Core Web Vitals.